Jump directly to main navigation Jump directly to content Jump to sub navigation

Deflection, deformation, waviness

If objects are loaded with a weight or moved free-standing over a certain distance, a smaller or larger warping of the object always occurs. Measuring this deflection can be accomplished for larger objects using all possible distance sensors. On the other hand, if the deflection of a small slab should be measured, high precision measuring systems like those developed by Micro-Epsilon are necessary for this. Deflections from the metre range down to trillionths of a metre can be measured at Micro-Epsilon.

Automated measurement of railway fishplates

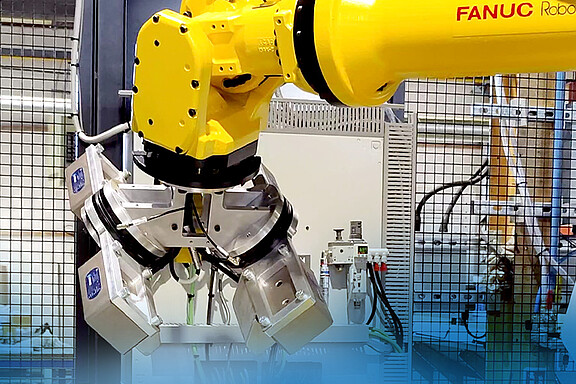
The company Mills CNC is a supplier of machine tools. They use MicroEpsilon laser sensors for the automatic inspection of large, hot-rolled railway fishplates made of steel. These fishplates join two rails together and must be as straight and flat as possible. In a machine tool automation cell specially developed by Mills CNC for this task, both the bend and a twist of the fishplates are determined. For this measurement task, an optoNCDT 1750 Micro-Epsilon sensor with a large measuring range of 750 mm is mounted on a robot. Its compact sensor design and direct data output without external controllers enable easy integration.

automated-measurement-railway-fishplates.jpg

Load tests on aeroplane wings

In order to optimise the behaviour of wings during a flight, the wings are already subjected to vibration tests during the construction. 120 wireSENSOR string potentiometers are connected to the wing and synchronised. In this way, any change of the wing form in the vertical direction can be tracked.

load-tests-airplane-wings.jpg

Planness measurement of display glass

Thinnest glass of outstanding flatness is required for the production of displays for telecommunications equipment. During glass production measuring and monitoring of the flatness is a decisive factor for quality inspection. The results of these measurements can be used for optimising the pro-duction process. On a high-precision hard rock table in the measuring room samples of these thinnest glass plates are measured by laser-optical triangulation sensors with an accuracy of 5 μm.

dummy-900x600.jpg

Deflection/cambering of steel strips and saw blades

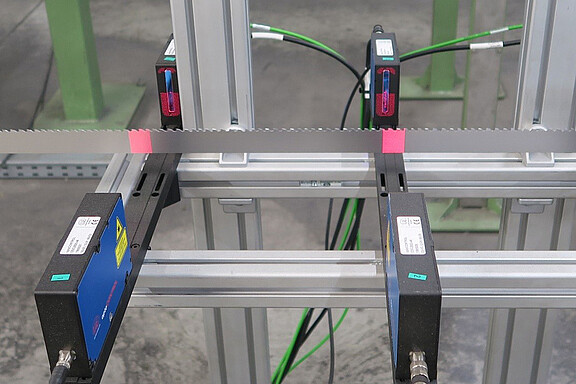
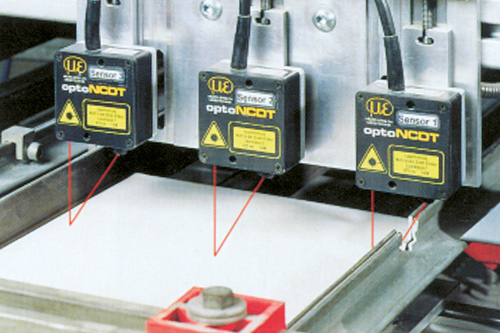
In the production and processing ne of metal strips, numerous measurement variables need to be monitored, e.g. straightness, cambering and deflection. The inspection of these quantities is carried out using three optical micrometers. The two outer laser micrometers form a straight line. The middle one measures the deviation and therefore the deflection to this straight line. The position of the sheet edge in the laser beam is not important here as long as the edge is within the beam path of all the three micrometers.

deflection-steel-strips-saw-blades.jpg

System for testing the risk of creaking with combinations of materials

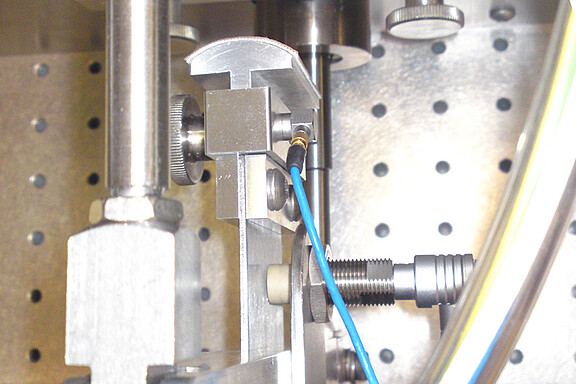
Ziegler Instruments in Mönchengladbach, Germany develops  and  manufactures  test  systems  that  are  able  to predict the risk of creaking noises due to stick-slip vibrations. In this way, the movement of different material combinations relative to each other - so-called „stick-slip“ - can be examined. For example, a passenger car driving for 100,000km can be simulated in the laboratory in just a few hours.

system-testing-risk-creaking.jpg

Deflection of rotor blades

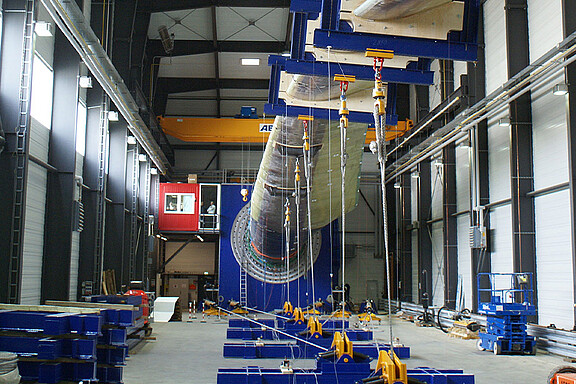
Mechanical loads on wind turbine rotor blades are measured using a test rig at the Fraunhofer Institute IWES, Bremerhaven. The rotor blades are mounted on the test rig and adjusted using cable winches. Displacement is measured by using several wireSENSOR P115 string potentiometers.

deflection-rotor-blades.jpg

Monitoring the clamping position of tools

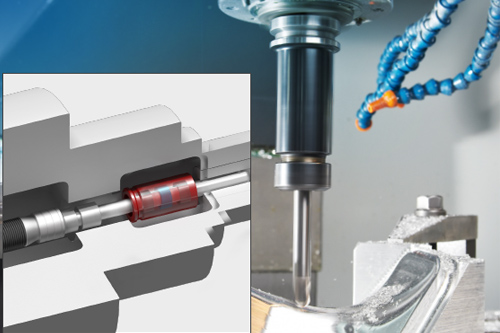
Often, initiators and switching rings, which provide a switching signal, are used to monitor the clamping position in high-performance tool machines. However, these require complex adjustment and set up. Analog sensors from the Micro-Epsilon LVP series offer significant improvements. The cylindrical sensor is integrated into the release device and directly measures the clamping stroke of the drawbar. On the drawbar, a ring is fastened, which acts as the target for the sensor. The LVP sensor can be universally used with the most varied types of tool due to an extremely compact sensor design. The sensor supplies an analog signal according to the stroke motion of the drawbar when clamping the tool. Consequently, continuous monitoring is possible without the switching point having to be laboriously set mechanically. The miniaturized sensor electronic unit can either be accommodated at the point of measurement or in the control cabinet. Thanks to its high accuracy, the LVP sensor contributes significantly to meeting the ever increasing demands on machine tool precision and availability.

monitoring-clamping-position-tools.jpg

Fully automatic measurement of sheet metal

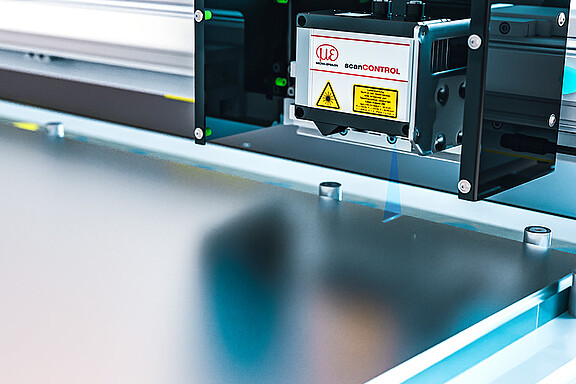
Dimensionics developed the Disionic Sheet Control measuring table for fully automatic testing of the dimensional accuracy of sheet metal. It operates with laser profile sensors by Micro-Epsilon. The sensors measure sheet metal blanks and check them for width, length, angle, straightness, deflection (convex/concave), and the planarity of the sheet metal edges.

Two scanCONTROL 3000 laser profile scanners are mounted on the XY table. Each scanner has a measuring range of 25 mm and is guided over two edges in the X or Y direction of the sheets. The Blue Laser technology ensures the sensors achieve maximum precision and reliable results on demanding metallic surfaces.

fully-automatic-measurement-sheet-metal.jpg

Flatness measurement in rolling mills

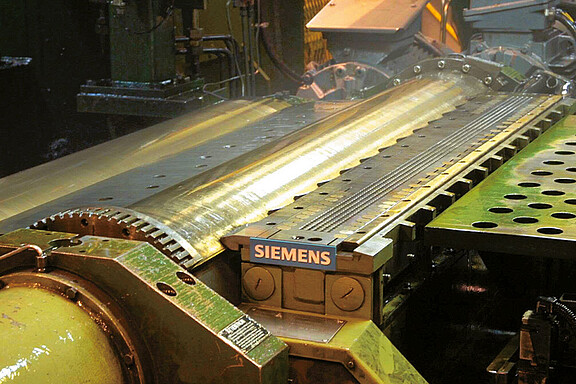
The requirements on the surface quality of rolled sheet metal are continually increasing. This may be steel sheet which is used, for example, for stainless steel fronts in kitchens, or also aluminum sheet used in the automotive field. The surface must be flawless to offer the customer a high quality visual appearance. Consequently, measurement equipment is employed in rolling mills to acquire the so-called flatness of the rolled sheet metal. Flatness is taken to mean the surface evenness of the sheet in the unstressed state.

flatness-measurement-rolling-mills.jpg

Flatness inspection on ceramic wall tiles

In the production of ceramic wall tiles or similar products, a one hundred percent quality inspection is essential. Three laser triangulation displacement sensors measure the deflection of tiles with an accuracy of 0.1 μm. Separate specification values can be entered for concave or convex deflections.

flatness-inspection-ceramic-wall-tiles.jpg